This post may contain affiliate links. Read the full disclosure here.
How To Start A Direct Sales Blog
So you have finally decided to take the plunge and create your first self-hosted WordPress blog! Congratulations! This tutorial will teach you how to start a direct sales blog. Don’t worry, this is not as difficult as it might sound. They have definitely made this process A WHOLE LOT EASIER since the first time I did this back in 2009.
This short guide will help take you through the process and result in you having your own blog ready to be filled with content (and make sales, and attract team members).
****By the way, if you are a little overwhelmed by this process, you can truncate it a bit by starting a blog at my new site, mydirectsalesblog.com. Here you can start a WordPress blog but without any set-up issues, and also have a community of women in direct sales like you. Check it out.
Step One: Free or Paid? That Is The Question
I know you may be tempted to try to go the f-r-e-e route, but believe me, you don’t want to. This is your business, and if you are setting up a blog to enhance your business, then it will be worth your while to get a paid blog.
Don’t be spooked by the term “paid” blog. All this just actually means is that you will be:
- 1) purchasing your own domain name
and
- 2) opening up a hosting account.
If you were just running a no-frills personal blog, then you could (maybe) opt for a free method (like Blogger or WordPress.com). But, you’re not.
With free blogging sites, your content does not belong to you when you publish it, it belongs to the free site hosting your blog. You wouldn’t want all your hard work to go poof and vanish at any time, would you? Let me answer that for you: no, you wouldn’t.
So that is why we are going to create a self-hosted WordPress blog, which does belong to you, and is different from WordPress.com. You are basically taking all the functionality of WordPress, and harvesting it all for your gain (mwah ha ha).

Step Two: Choose A Service
There are quite a few different companies that you can choose to host your blog with. I recommend Bluehost since you get a free domain name when you purchase their services. Plus, they are quite affordable!
So, head on over to Bluehost and follow along with this quick tutorial as you set up your blog. It will take 5 minutes to install.
Step Three: Pick Your Hosting Plan
When you click over to Bluehost, your screen will look something like this.
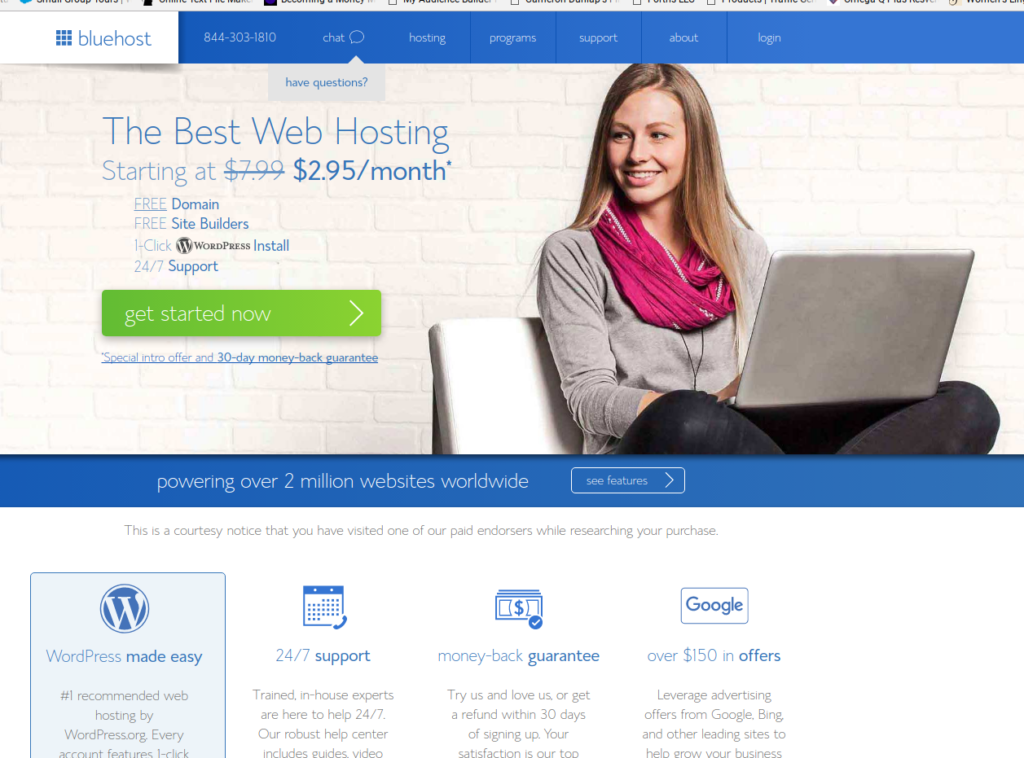
Go ahead and click the “Get Started Now” button.
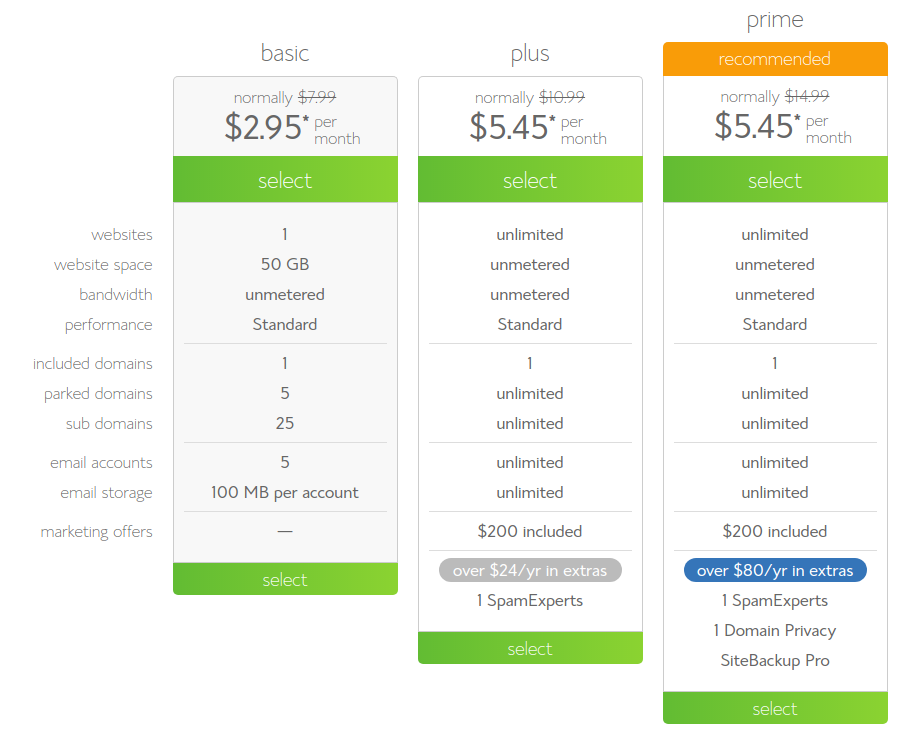
You’re going to then get quite a few options for hosting, but don’t sweat it. Just choose the “Basic” plan as that is all you will need for now.
Step Four: Create and Register Your Domain Name
Now, you will need to choose the domain name for your new blog.
This could be your name dot com or something to describe your business. But, choose carefully! Your business branding rests 100% on this!
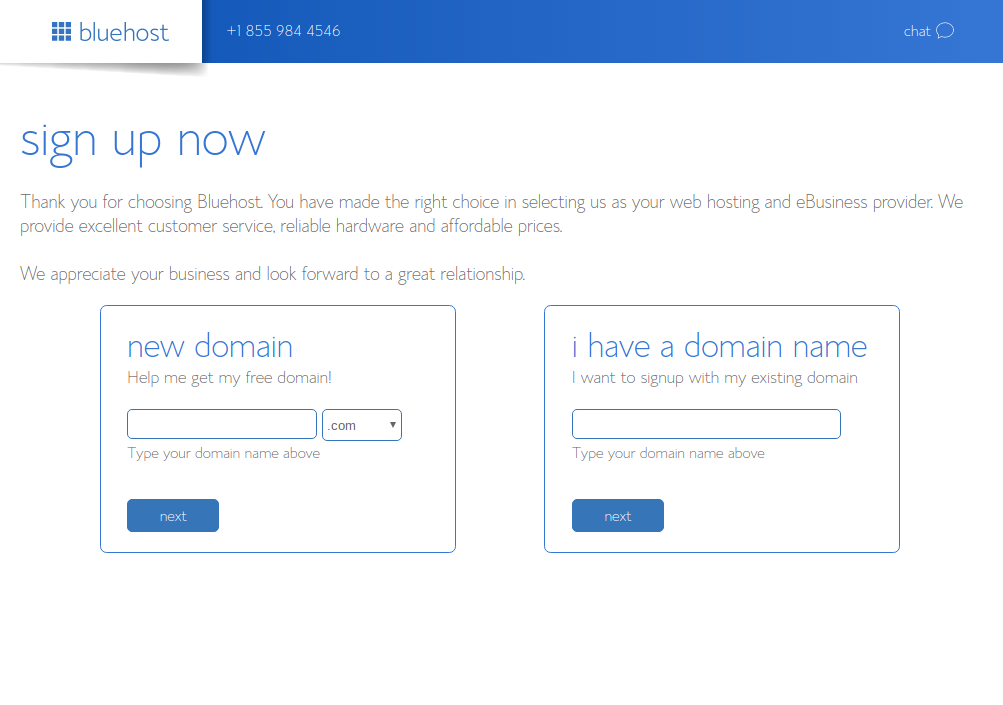
You will find out if the name has been taken or not. If it has, go back and choose another one and keep trying until a name you like is free.
Step Five: Purchase Your Hosting Package
Now you’re going to create your account as well as purchase your hosting package.
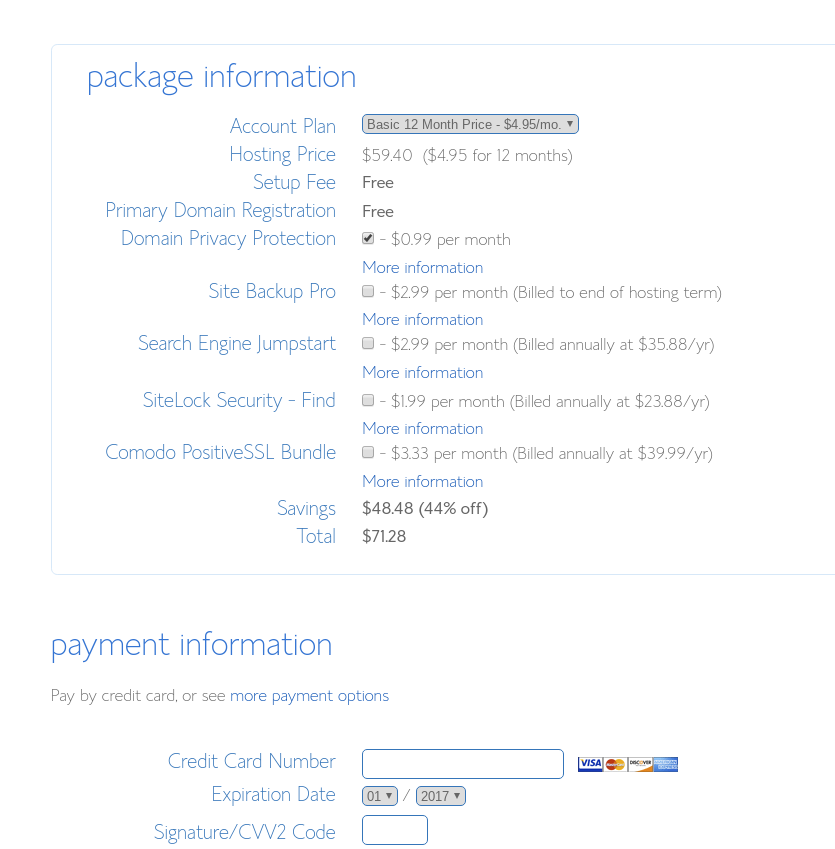
As you can tell, the more months you purchase upfront, the more savings you acquire. It’s up to you, but either way, the monthly rate that you are getting when you pay all at once is MUCH cheaper than paying monthly.
Why pay ahead for at least 12 months for hosting? Well, if you are really serious about blogging for your direct sales business (and saving money!), then it is one less thing you have to worry about. And, who doesn’t want less worries?
Just pay once, and you won’t have to worry about a monthly fee for 1-3 years. Yes! Now, on to your REAL income producing activities 😉
As you scroll down the screen, you will notice that there are many checked boxes. You can uncheck all of these if you would like, as they are not exactly necessary. But, this choice is all up to you!
Input your payment information and choose a password!
Step Six: Install WordPress
You are going to be taken to your Bluehost Cpanel. Scroll down until you see the “install WordPress” icon and click it. Then, you will need to also install your domain name.
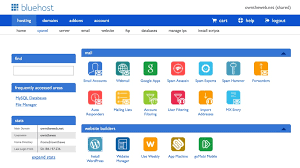
Finally, you will need to go to your email and you will be guided to your WordPress dashboard.
Congratulations! You are officially the owner of a direct sales blog!
So, you’ve set up your blog, now what? Well, now you’ve got to design it! Click here for Part II of the setup, Blog Design.
Also, you can do all of this and more at mydirectsalesblog.com
To Your Success,